How to Check Your Oil Level at Home (And What It Tells You)


July 22, 2025

How to Check Your Oil Level at Home (And What It Tells You)

You’ll need to park on level ground and wait 5-10 minutes after turning off your engine so the oil can settle. Pull out the dipstick, clean it thoroughly, then reinsert it fully before pulling it out again for an accurate reading. Check that oil sits between the minimum and maximum marks on the dipstick. Dark, sludgy oil indicates it’s time for a change, while levels below minimum require immediate attention to prevent costly engine damage that could leave you stranded.

Key Takeaways

  • Park on level ground, turn off the engine, wait 5-10 minutes for the oil to settle, then engage the parking brake.
  • Pull the dipstick out, clean it thoroughly, reinsert it, and then pull it out again to check the oil level reading.
  • Oil should sit between the minimum and maximum marks; if it falls below the minimum, immediate oil addition is required to prevent damage.
  • Dark, sludgy oil indicates an overdue replacement; a milky appearance suggests coolant contamination, requiring professional attention.
  • Metal particles, unusual engine noises, or oil levels below the minimum line signal an immediate need for an oil change or service.

When and Why Oil Level Checks Matter Most

Pouring oil inside vehicle (AI-Generated) | Euro Auto Tech & Smog

While modern engines are designed to run thousands of miles between oil changes, checking your oil level regularly can save you from catastrophic engine damage and expensive repairs.


You should check your oil monthly, before long trips, and when warning lights appear. Oil burns off naturally during operation, and leaks can develop without obvious signs.


Low oil levels cause metal components to grind together, generating excessive heat and potentially seizing your engine. A quick monthly check takes two minutes but prevents thousands in repair costs.


Don’t wait for dashboard warnings—they often appear after damage has already begun occurring.

Essential Tools and Preparation Steps

Before you check your oil level, you’ll need just a few basic tools and should prepare your vehicle properly.


The required tools are minimal and likely already in your garage, while proper preparation guarantees you get an accurate reading.


Let’s examine what you’ll need and the essential steps to take before checking your oil.

Required Tools Overview

Checking your engine oil requires minimal equipment, making it one of the simplest maintenance tasks you can perform.


You’ll need a clean cloth or paper towels to wipe the dipstick and handle any spills. A funnel becomes essential if you need to add oil later. Keep a small bottle of appropriate engine oil nearby for topping off.


That’s it – no specialized tools or expensive equipment required. These basic items, which most people already have at home, will enable you to monitor your engine’s health effectively and catch potential problems before they become costly repairs.

Pre-Check Vehicle Preparation

With your tools ready, proper vehicle preparation guarantees accurate oil level readings and prevents false measurements that could lead to overfilling or underfilling your engine.


Park your car on level ground—avoid slopes or inclined driveways that’ll skew readings. Turn off your engine and wait 5-10 minutes, allowing oil to settle back into the pan. Hot oil expands and circulates throughout the system, creating inaccurate dipstick readings.


Engage your parking brake for safety. Pop the hood and locate your dipstick, usually marked with a bright handle or “ENGINE OIL” label. You’re now ready for an accurate measurement.

Locating Your Dipstick and Oil Components

Container for pouring oil in engine (AI-Generated) | Euro Auto Tech & Smog

Success in checking your oil level depends on finding the right components under your hood.


Pop the hood and locate the dipstick first—it’s typically a bright yellow, orange, or red handle with “ENGINE OIL” marked on it. The dipstick extends deep into your engine’s oil pan.


You’ll also spot the oil filler cap nearby, usually circular with an oil can symbol. Some vehicles have the dipstick near the center of the engine, while others position it toward one side.


If you can’t find it immediately, consult your owner’s manual for your specific vehicle’s dipstick location.

Step-by-Step Oil Checking Process

Once you’ve located your dipstick, guarantee your engine is warm but not hot—ideally after driving for a few minutes, then letting it sit for 5-10 minutes to allow the oil to settle back into the pan.


Pull the dipstick straight out and clean it completely with a rag or paper towel. Reinsert it fully until it’s seated properly, then immediately pull it out again.


Check the oil level against the minimum and maximum marks on the dipstick. The oil film should appear between these marks for best engine protection and performance.

Reading and Interpreting Dipstick Measurements

Oil being poured into vehicle (AI-Generated) | Euro Auto Tech & Smog

Once you’ve pulled the dipstick out, you’ll need to read it correctly to get an accurate measurement.


The key is understanding what the markings mean and where your oil level falls between the minimum and maximum indicators.


You’ll want to check the oil film on both sides of the dipstick to guarantee you’re getting the most accurate reading possible.

Proper Dipstick Reading Technique

After pulling the dipstick from your engine, you’ll need to read it correctly to get an accurate oil level measurement.


Hold the dipstick vertically and examine where the oil film ends on the metal surface. You’ll see two marks: minimum and maximum levels. The oil should sit between these markers, ideally closer to the maximum line.


Don’t read the dipstick immediately after removing it—oil droplets can create false readings.


Instead, look for the distinct wet line where clean oil meets the dry metal surface. This clear boundary indicates your actual oil level for proper assessment.

Oil Level Indicators

The dipstick features distinct markings that tell you whether your oil level falls within the safe operating range.


You’ll typically find minimum and maximum indicators, often marked as “MIN/MAX” or shown through crosshatched areas.


Here’s what different levels mean:

  • Below minimum – Add oil immediately to prevent engine damage
  • At minimum – You’re running low and should add oil soon
  • Between min/max – Your oil level is safe for normal operation
  • Above maximum – You’ve got too much oil, which can cause performance issues

Always read the level where oil clings to the dipstick after wiping it clean once.

Understanding Oil Color and Consistency Clues

When you pull out the dipstick, you’ll notice that your oil’s appearance tells a story about your engine’s health. Fresh oil appears amber or honey-colored with a smooth, flowing consistency.


As it ages, it darkens to brown or black, indicating it’s collecting dirt and combustion byproducts.


If you see thick, sludgy oil, it’s overdue for replacement.


Metal particles suggest internal engine wear, while a milky appearance indicates coolant contamination—a serious problem requiring immediate attention.


Foamy oil signals air bubbles from overfilling or mechanical issues.


These visual clues help you determine whether you need an oil change or professional diagnosis.

Warning Signs Your Oil Level Reveals

Oil being poured into vehicle (AI-Generated) | Euro Auto Tech & Smog

Beyond color and texture, your dipstick’s oil level measurement reveals critical warnings about your engine’s condition.


Different oil levels signal specific problems that demand immediate attention.


Here are four critical warning signs:

  • Oil below minimum mark – Indicates potential leaks, burning oil, or overdue changes
  • Consistently dropping levels – Suggests internal engine wear or external leaks
  • Oil above maximum mark – Points to overfilling, which can damage seals and gaskets
  • Rapid level changes – Signals serious internal problems requiring professional diagnosis

Don’t ignore these warnings.


Low oil levels can cause catastrophic engine damage, while overfilling creates pressure issues that compromise performance.

Common Oil Level Problems and Their Causes

Understanding these warning signs helps you identify problems, but knowing what causes them empowers you to prevent costly repairs.


Low oil levels typically result from leaks in gaskets, seals, or drain plugs, while excessive consumption indicates worn piston rings or valve seals.


High oil levels occur from overfilling during changes or coolant contamination from head gasket failure.


Dirty oil stems from infrequent changes or severe driving conditions.


Metal particles suggest engine wear, while milky oil indicates coolant mixing with oil.


Burnt oil smells signal overheating from low levels or failing cooling systems.


Identifying these causes prevents major engine damage.

How Often to Monitor Your Oil at Home

Oil being poured on engine (AI-Generated) | Euro Auto Tech & Smog

Regular oil monitoring protects your engine from catastrophic damage and extends its lifespan greatly. You should check your oil level weekly if you drive daily, and before long trips regardless of recent checks.


Monthly monitoring works for occasional drivers or garage-kept vehicles.


Your checking frequency depends on several factors:

  • Vehicle age – Older engines consume more oil and need frequent monitoring
  • Driving conditions – Stop-and-go traffic, extreme temperatures, and heavy loads increase oil consumption
  • Oil type – Conventional oil breaks down faster than synthetic blends
  • Engine condition – High-mileage engines with worn seals require closer attention


Consistent monitoring prevents expensive repairs.

Next Steps When Oil Issues Are Detected

When your oil check reveals problems like low levels, dark discoloration, or metal particles, you’ll need to take immediate action.


If the oil’s simply due for replacement based on mileage or time intervals, you can change it yourself or schedule service.


However, more serious issues like significant contamination or rapid oil loss require professional diagnosis to prevent costly engine damage.

When to Change Oil

Three critical signs indicate it’s time to schedule an oil change: dirty or dark oillow oil levels, or unusual engine noises during operation.


Don’t ignore these warning signals, as they can lead to expensive engine damage.


Follow these timing guidelines for oil changes:

  • Every 3,000-5,000 miles for conventional oil
  • Every 7,500-10,000 miles for synthetic oil
  • Every 6 months regardless of mileage for infrequent drivers
  • Immediately when oil appears black, gritty, or contains metal particles

You’ll also need immediate service if your dipstick shows oil below the minimum line or if you hear knocking sounds from your engine.

Seeking Professional Help

After identifying any of these oil-related warning signs, you’ll want to contact a qualified mechanic promptly.


Don’t attempt major repairs yourself—oil system problems require professional expertise and specialized tools.


When scheduling your appointment, describe your symptoms clearly. Mention unusual colors, consistency changes, or low levels you’ve discovered. This information helps mechanics diagnose issues efficiently.


Choose a reputable shop with ASE-certified technicians. They’ll perform thorough diagnostics beyond simple visual checks, using pressure gauges and computerized systems.


Address oil problems immediately—delaying repairs risks catastrophic engine damage costing thousands.


Professional intervention now prevents expensive rebuilds later.

Frequently Asked Questions

Can I Check Oil Level Immediately After Driving or Does Engine Need Cooling?

You shouldn’t check your oil level immediately after driving.

Wait at least 5-10 minutes after turning off your engine to let it cool down and allow the oil to settle back into the oil pan.

If you check it right away, you’ll get an inaccurate reading because the oil’s still circulating throughout the engine.

Park on level ground and use the dipstick only after the oil has had time to drain down completely.


What Should I Do if My Dipstick Is Missing or Damaged?

If your dipstick’s missing or damaged, don’t attempt to check your oil level.

You’ll need to replace it immediately since driving without knowing your oil level risks severe engine damage.

Visit an auto parts store with your vehicle’s make, model, and year to get the correct replacement dipstick.

They’re inexpensive and easy to install.

Don’t use makeshift alternatives or drive extensively until you’ve installed a proper replacement dipstick.


Is It Normal for Oil Level to Fluctuate Between Seasons?

Yes, you’ll notice slight oil level fluctuations between seasons due to temperature changes.

Cold weather causes oil to contract and thicken, while heat makes it expand and thin out. You might see lower readings in winter and slightly higher ones in summer.

However, significant changes aren’t normal and could indicate leaks, burning, or consumption issues.

Always check your oil when the engine’s warm but not hot for the most accurate reading.


Can Overfilling With Oil Damage My Engine Permanently?

Yes, overfilling your engine with oil can cause permanent damage.

You’ll risk blown seals, damaged catalytic converters, and fouled spark plugs when excess oil creates pressure and foaming. The crankshaft whips overfilled oil into foam, reducing lubrication effectiveness and potentially causing bearing damage.

If you’ve overfilled, drain the excess immediately. Severe overfilling can lead to costly repairs including engine rebuild or replacement, so always stick to manufacturer specifications.


Should I Use the Same Oil Brand When Topping Off?

You don’t need to use the same oil brand when topping off, but you should stick to the same viscosity and type.

Mixing different brands with identical specifications won’t harm your engine. However, don’t mix conventional with synthetic or different viscosities like 5W-30 with 10W-40.

Check your owner’s manual for the correct oil specification, then you can confidently top off with any brand that meets those requirements.

Technician adjusting knob on engine of vehicle (AI-Generated) | Euro Auto Tech & Smog
February 26, 2026
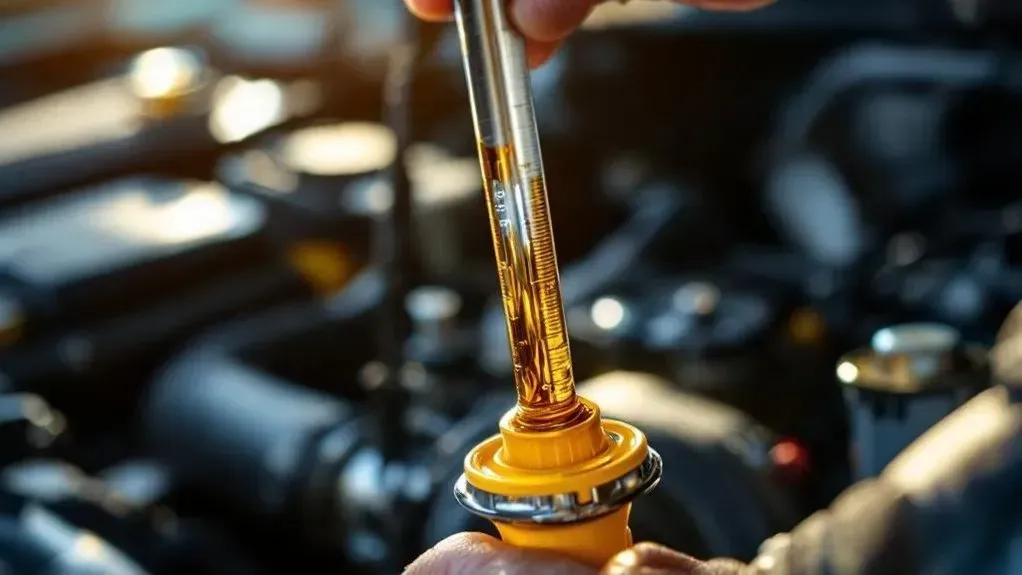
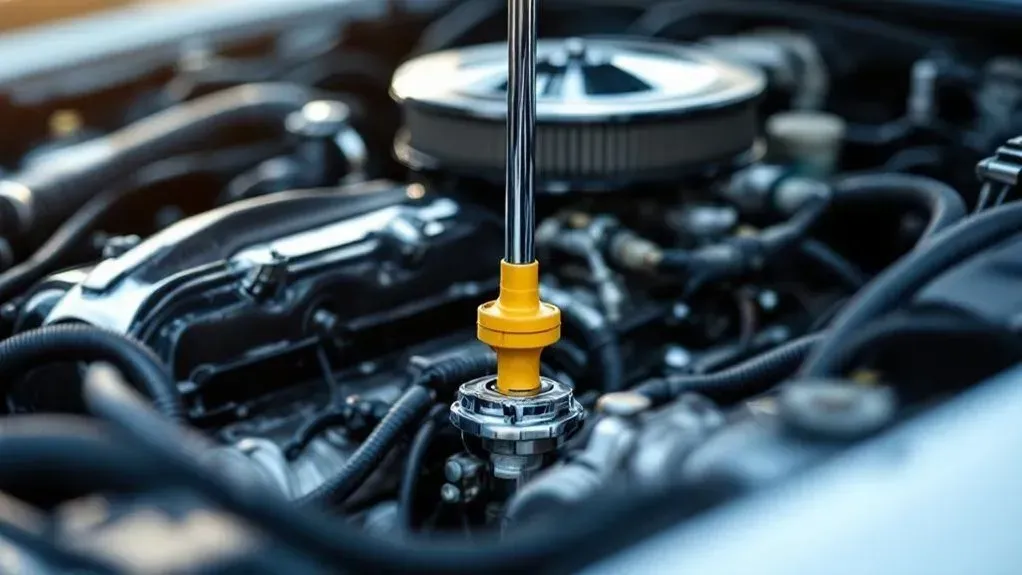
Maintain your BMW's performance with essential maintenance tips. From regular inspections to fluid checks, ensure your car runs smoothly for years to come.
Blue BMW car parked inside of garage (AI-Generated) | Euro Auto Tech & Smog
January 16, 2026
Keep your BMW in peak condition with our top servicing tips. Extend longevity and enhance performance with essential maintenance strategies for your vehicle.
Cold air from the air conditioning dashboard of the car (AI-Generated) | Euro Auto Tech & Smog
December 15, 2025
5 Key Warning Signs Your Car’s Air Conditioning or Heating System Needs Service
Up close to rain drops outside of black vehicle (AI-Generated) | Euro Auto Tech & Smog
November 27, 2025
This critical calibration process prevents your ADAS from dangerously malfunctioning—but most drivers don't realize when their systems drift out of alignment.
Technician adjusting knob on dashboard (AI-Generated) | Euro Auto Tech & Smog
August 21, 2025
Keep your car's AC running efficiently through San Diego's intense summer heat with these critical maintenance steps that most drivers overlook.
Car inside garage on lift with technician performing diagnostic (AI-Generated) | Euro Auto Tech & Smog
August 21, 2025
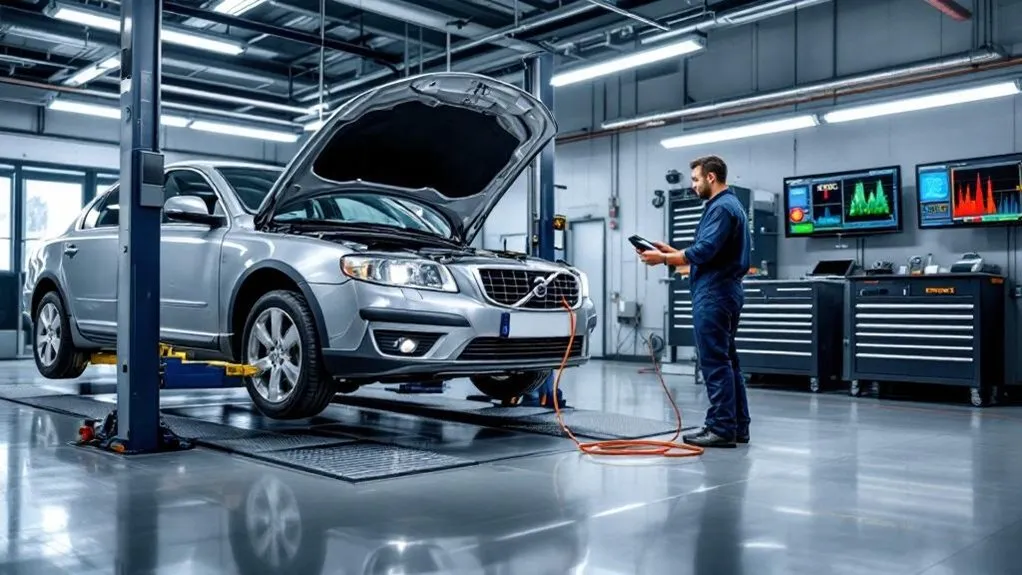
Discover how to find reliable engine diagnostic services in San Diego County for $100-150 without falling victim to costly scams.
Technician taking out dirty air filter (AI-Generated) | Euro Auto Tech & Smog
July 22, 2025
Unlock the secret strategies that guarantee your vehicle passes smog inspection on the first attempt without costly repairs or retests.
Two cars in garage, one car on lift and one car with the hood up (AI-Generated) | Euro Auto Tech & Smog
June 24, 2025
Imagine preventing thousands in repair costs with simple inspections that catch expensive problems before they become financial disasters.
Technician with magnifying glass examining part underneath vehicle (AI-Generated) | Euro Auto Tech & Smog
June 24, 2025
Identify critical transmission warning signs like grinding noises, burning smells, and gear slipping before costly repairs become complete system failure